|
Ring-necked pheasants are some of the most colorful birds in Wyoming, and they have a lot of character. To create one, your kid just needs to draw a few shapes and add a little detail. Once they have learned how to draw a pheasant, encourage them add some color to bring it to life!
If they need some inspiration while drawing, you can listen to the ring-necked pheasant episode of Furs, Fins and Feathers on Spotify or YouTube.
Click here for a printable version of this how to draw tutorial.
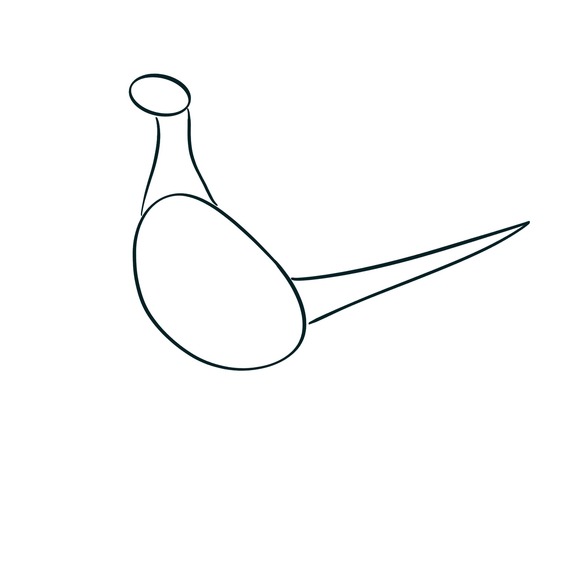
Step 1) First, let’s block out the pheasant’s form using simple shapes. Draw a large, slanted oval for the main body and a much smaller circle above it for the head. Connect the head to the body with two curving lines to create the long, graceful neck, and add a very long, thin triangle extending from the rear of the body to place the tail.
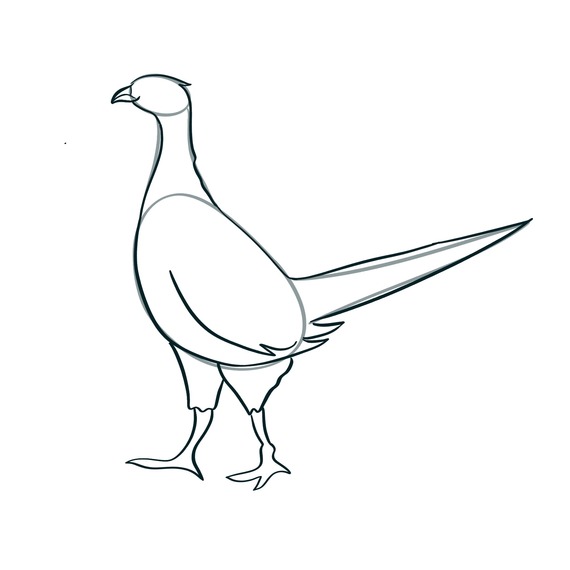
 Step 2) Now, connect your shapes to create a smooth, bird-like silhouette, blending the head, neck, and body together. Sketch in the shape of the wing and the small, pointed beak and eye on the head. Add two stick-like legs descending from the bottom of the body oval, giving them a slight “knee” bend and adding small talons for feet.
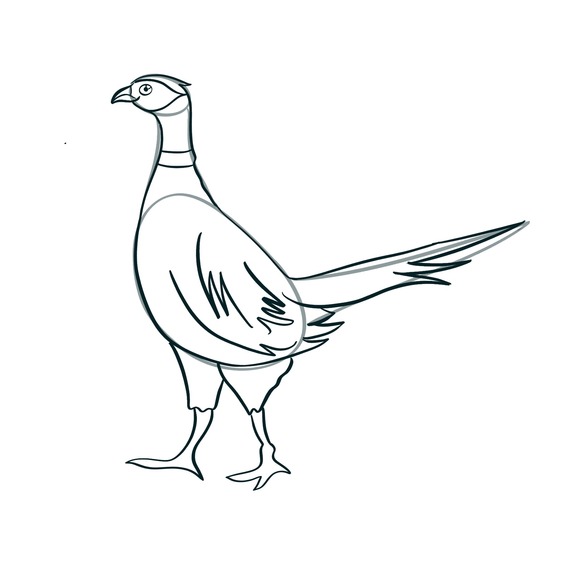
 Step 3) Add its most recognized features! Carefully draw the bold ring that separates the iridescent head from the body, and sketch in the distinctive red wattle (the patch of skin) around the eye. Refine the tail by drawing several long, parallel feathers, and add a few curved lines on the wing to suggest a feather pattern.
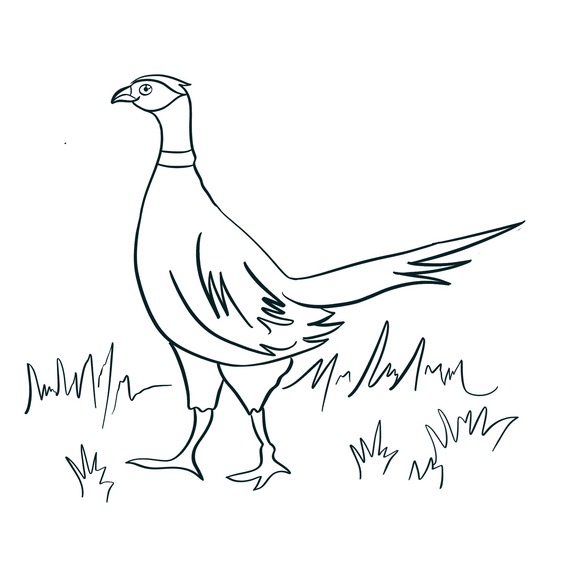
 Step 4) Finally, go over your sketch with clean, confident lines and erase your initial guidelines. A few tufts of grass around the feet will place your pheasant right here in Wyoming’s landscape.
|